Introduction
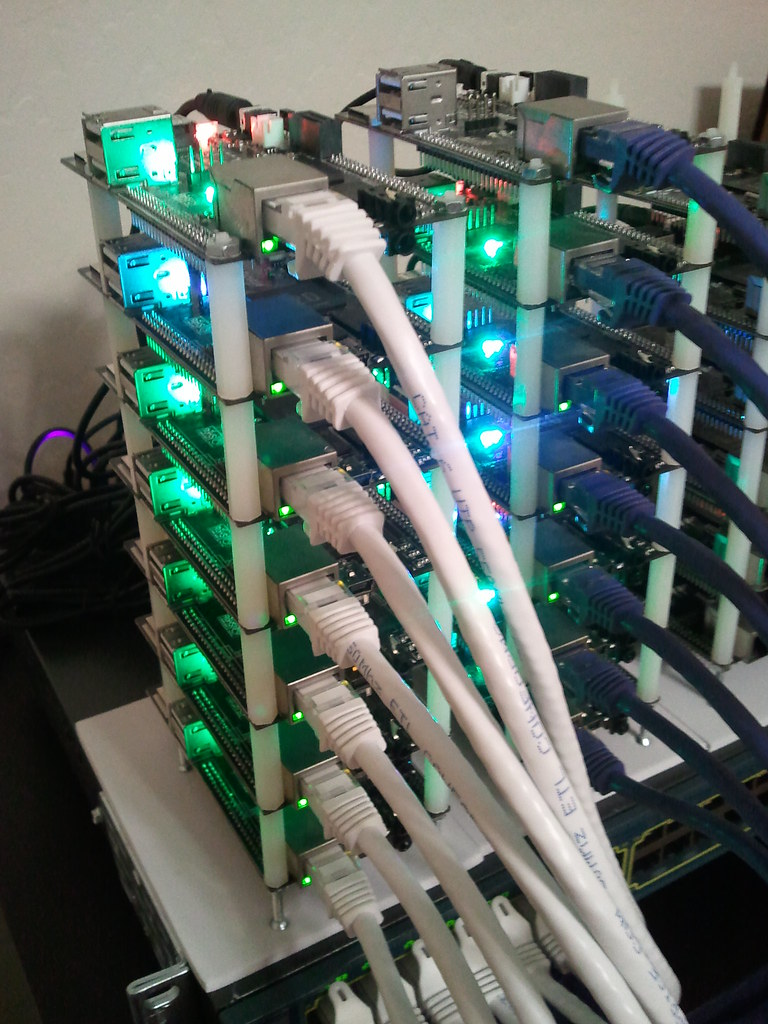
While I have this on my mind, I decided to build a microk8s cluster from a bunch of raspberry pis that I have laying around. Why? In practice more useful than minikube which is also great for local development.
What we will be using
- Ubuntu 22.04.03 Linux distribution
- 32 bit for contro pi 3b armhf
- 64 bit for 4 arm64
- Ansible
- microk8s
- prometheus, grafana, node_exporter
Using five raspberry pi’s. One for an Ansible control to deploy software and four for our microk8s cluster
Hardware Setup
IP Allocation
I added address reservations on my router to automatically assign an IP to a known MAC address on a Raspberry pi. This ensures that the pi will have the same IP address each time it boots. No messing with the network configuration in the operating system every time I re-install the OS. Since this is technically a test environment where I will burn-and-build at will. I will not go through this excercise as there ae many ways to do this on a DHCP server.
To obtain the MAC aaddress, I first installed an OS on the pi and noted down the MAC.
OS Installation
Use raspberry pi imager. You can download the softwaere here https://www.raspberrypi.com/software/
Ansible
for automation
Copy Ansible keys to other hosts from cloudletcmd
ssh-copy-id -i ansible_rsa.pub pi@192.168.1.200
ssh-copy-id -i ansible_rsa.pub pi@192.168.1.201
ssh-copy-id -i ansible_rsa.pub pi@192.168.1.202
ssh-copy-id -i ansible_rsa.pub pi@192.168.1.203
ansible-playbook update.yml –ask-become-pass
ansible all -m ping
For microk8s
sudo nano /boot/firmware/cmdline.txt
add the following to the file
cgroup_enable=memory cgroup_memory=1
then reboot
sudo reboot
MicroK8s
sudo snap install microk8s --classic
sudo apt install linux-modules-extra-raspi
sudo microk8s stop; sudo microk8s start
sudo microk8s.add-node <- have to run for each node
From the node you wish to join to this cluster, run the following:microk8s join 192.168.1.200:25000/cfd6f5addae6e0959a4c7f1de1f47a47/583d9c2f5994
Use the ‘–worker‘ flag to join a node as a worker not running the control plane, eg:microk8s join 192.168.1.200:25000/cfd6f5addae6e0959a4c7f1de1f47a47/583d9c2f5994 --worker
If the node you are adding is not reachable through the default interface you can use one of the following:microk8s join 192.168.1.200:25000/cfd6f5addae6e0959a4c7f1de1f47a47/583d9c2f5994
192.168.1.200 cloudlet01
192.168.1.201 cloudlet02
192.168.1.202 cloudlet03
192.168.1.203 cloudlet04
microk8s join 192.168.1.200:25000/0c4812f17a41a0a6c9e0a931d263d0eb/583d9c2f5994
microk8s enable ha-cluster on main node
kube config
to add to .kube/config run sudo microk8s config and add output to config.
sudo usermod -a -G microk8s pi
Prometheus
Set up
Manually setting up Prometheus node exporter
sudo groupadd --system prometheus
sudo useradd -s /sbin/nologin --system -g prometheus prometheus
sudo apt update
sudo apt -y install wget curl vim
sudo apt autoremove
curl -s https://api.github.com/repos/prometheus/node_exporter/releases/latest | grep browser_download_url | grep linux-arm64 | cut -d '"' -f 4 | wget -qi -
tar xvf node_exporter-1.5.0.linux-armv7.tar.gz
cd node_exporter-1.5.0.linux-armv7/
sudo mv node_exporter /usr/local/bin
node_exporter --version
A basic service config for node_exporter:
sudo vim /etc/systemd/system/node_exporter.service
[Unit]
Description=Prometheus
Documentation=https://github.com/prometheus/node_exporter
Wants=network-online.target
After=network-online.target
[Service]
Type=simple
User=prometheus
Group=prometheus
ExecReload=/bin/kill -HUP $MAINPID
ExecStart=/usr/local/bin/node_exporter \
--collector.cpu \
--collector.diskstats \
--collector.filesystem \
--collector.loadavg \
--collector.meminfo \
--collector.filefd \
--collector.netdev \
--collector.stat \
--collector.netstat \
--collector.systemd \
--collector.uname \
--collector.vmstat \
--collector.time \
--collector.mdadm \
--collector.zfs \
--collector.tcpstat \
--collector.bonding \
--collector.hwmon \
--collector.arp \
--web.listen-address=:9100 \
--web.telemetry-path="/metrics"
[Install]
WantedBy=multi-user.target
sudo systemctl daemon-reload; sudo systemctl start node_exporter; sudo systemctl enable node_exporter; sudo systemctl status node_exporter
Remove microk8s
sudo microk8s reset
sudo snap remove microk8s
